Sunday, 19 April 2015

wedding bloomers

Hers and His wedding bloomers
Still on the wedding theme, what to get for the couple who want no presents? Something practical and a touch sentimental with a finite lifespan.

Whilst working on the Cameo project I came across Spoonflower cameo fabrics and suddenly very much wanted to make my own version. Being a bit nervous about non-uk sites, I was delighted to discover Woven Monkey. I would recommend it. For really big pieces it could get quite pricey but great for small projects.

 I could have spent more time on the colour scheme but was going a bit cross eyed by that point. The final print was a bit bigger than I realised but looking at the site I should have figured that out if I had been concentrating.


The cameos are of the bride and groom and their 2 dogs. They actually do look like them, which cracks me up.

After the fabric arrived I spent some time considering what to do with it. I thought about a bag, oven gloves, tea towel, pyjama case...in the end I settled on his and hers underpants.


Thursday, 9 April 2015

bridesmaid activist doll

Bridesmaid girl
Inspired by Tree Change Dolls: http://treechangedolls.com.au

After discovering Sonia Singh's beautiful work a couple of months ago, I got a bit carried away in a frenzy of charity shop doll buying. Sonia saves poor rejected Bratz dollies and gives them their faces back, and some warm clothes and sturdy shoes or feet where they have stumps. 

The new dolls are so delightful it is little wonder they have become something of a global phenomenon. What is even more amazing is that the artist has seemingly rejected all sorts of offers to get rich quick from this. She is very generous in sharing her craft secrets and just seems to be a really good person. She is very much into recycling and reducing waste so I feel a little bit guilty about my first attempt because, well, I cheated a bit. 

I really wanted to make a little dolly for my niece as bridesmaid and I couldn't find a second-hand one with the same hair colour. Time was pressing so I..cough...bought a new 89p doll. Which I know probably encourages the factory to make more astoundingly cheap dollies, and thus the planet is a step closer to meltdown. So I apologise. The second thing about my dolly was her original face was quite nice. OK she had crazy eyelashes, but I think when you see the Tree Change before and afters you get the point - the more the contrast the greater the satisfaction.
  
My dolly before the makeover
Sonia Singh Tree Change makeover
The first thing I did was remove her face with acetone (nail varnish remover). Sonia uses eucalyptus oil as well but I haven't come across that in the UK. Maybe tea tree would do the trick.

Then I gave her a bit of a haircut and painted the scalp brown with acrylic paints (89p dolls have quite marked alopecia). I mixed my own brown (with tubes of red, yellow and blue, black and white I figured I had a good base for all colours). Then I painted on the eyes with a tiny brush. DO NOT BE FOOLED into thinking this is easy just because Sonia Singh's creations are so perfect. It is a fine line between creating an amused glint and a psychotic glare. And don't get me started on teeth. At one point she looked like she had tooth decay. In the end I was reasonably happy. The natural eyebrows make a big difference. I sealed it with a coat of Matt varnish as suggested by Sonia.  
face detail
For the shoes there is a really good video below. I had a go making my own 'Oo-goo' with cornflour and bath silicone caulk sealant. My hands got quite sticky and as there were no measurements it was tricky to get the balance between too sticky and too dry.


Some of the shoes looked a bit cracked so I DecoPatched them. This makes them a bit stronger and prettier.
bridesmaid shoes
Finally I made a dress to look as close as the bridesmaid dress as possible. It seemed to go down a treat.
Worth every stitch. Mum made the real girl's dress - so lovely
after a good play and a ride in the confetti flower petal basket 
And finally if it is all looking a bit too girly, her alter ego 'the NHS Activist' to remember all the marching she has done this year with her mum Bad Hair Day Lady and her aunties and uncles http://www.peoplesvotefornhs.org.uk:
http://www.peoplesvotefornhs.org.uk
Born in the NHS
Hand embroidery. T shirt made from old pants!
http://www.peoplesvotefornhs.org.uk
shoes
Scottish outfit
Thanks Sonia this was so much fun. Next doll will be a recycled one!

Friday, 3 April 2015

Cameo

Wedding cameo album cover
Although for myself I don't really get the marriage thing, the forthcoming wedding of my not-so-little-anymore brother has been unexpectedly exciting. His lovely wife to be is no other than Sunshine of the kaleidoscope quilts. It is a good thing to have fellow crafters in the family and I think one day we will have to make a group quilt in the old tradition.

The wedding has generated a number of unexpected and fun craft projects - this is one of my favourites. The idea came from seeing a pet dog cameo cushion (something like this). Along the way my cushion morphed into a photo album cover. I forgot to take a photo of the finished piece, no matter.

Step 1: Get profile shots of the couple - to save time rooting through albums for suitable photos (who takes profile shots?) the direct approach of asking for profile shots is best.

Step 2: On Picasa or similar photo software increase the contrast a lot, cut the cameos our, colour with black pen, rescan and increase contrast again until happy with the final cameos. I did both left and right profiles and picked the best.

Step 3: Design a frame - to do this start with an oval and then draw half the frame. I incorporated a number of symbols in the frame for special significance - a Scottish thistle because it is a mixed marriage ;-) Pisces and Aquarius, bicycles, 2 dogs which look a bit like wolves, initials, roosters for their Chinese birth year, and a stylised coat of arms which is a mix of the 2 surname coat-of arms with the eye of faith.

Step 4: Use Picasa to flip the image so you have 2 identical halves. Then on the computer, fit them together with the cameo in the middle. That bit was very fiddly.


Step 5: Print the finished Cameo onto Wash away stabiliser - I used Madeira Avalon Film. In the past I have done this using ordinary paper (for the Dear Aunty quilt and Doodle quilt)  but it takes a lot to pick out the bits of paper from the crevices after machine embroidery. For small projects I definitely recommend this, but it would be too pricey for a big project. I  printed the frame separately from the cameo as I did this in 2 steps

Step 5: Cut out fabric silhouettes of the cameos, glue them to a cream oval the size of the centre of the frame in the correct position. Machine embroider around the cameos. Soak away the stabiliser. Dry.

Step 6: Stick the cream oval with cameos onto a patterned fabric. Peel the stabiliser off the backing and stick over cameo. Free motion machine embroidery over the frame design. Repeat soaking and drying steps.


soaking away the stabiliser - very easy!
Detail of the frame 

Step 7: This wasn't planned, but I haven't mastered getting the tension right when machine embroidering - so as you can see the centre of the frame is all bunched up - I have inadvertently created a trapunto effect. So there was nothing for it but stick some sponge in the middle to smooth out the wrinkles and make it all look very deliberate. To keep that in place I sewed an oval from the front, around the frame.

Step 8: Use this to cover a small photo album and make it pretty with bits of lace. Job done.


Sunday, 15 March 2015

Patch Happy

home-made patchwork sofa
Patches. Make me happy.

A few years ago I re-covered a very drab Ikea sofa in a grey leaf design:

It did look tasteful but after 5 years I thought the room needed an injection of colour. I have been saving up bits of upholstery fabric for a couple of years. A local fabric shop sells oddments for 50p each in beautiful reds, golds and blues. I had a few bits from charity shops and leftover robin-egg blue from the curtains I made which you can just about see.

I also had material from the Maureen stash (a stack of haberdashery I inherited from Great Aunty Maureen) including this lovely oriental style fabric that I had already used to make the bird cushions and a pale green one with pink roses that had been a pair of her curtains at some point but she was planning to recycle. Some of her fabric dated back to the early 1970s, which makes it quite vintage now, just like me. It is so very satisfying to finally use up fabric that had been saved for over 30 years - a tribute to a fellow hoarder.
Detail of Maureen fabrics 
It took about a week to complete and I finished it off with a matching cushion. The teal up-cycled cushions harmonise well.

Patchwork. It is like an infection. Now I can see all sorts of patching possibilities. Soon we will be living in a patchwork house.


Saturday, 14 February 2015

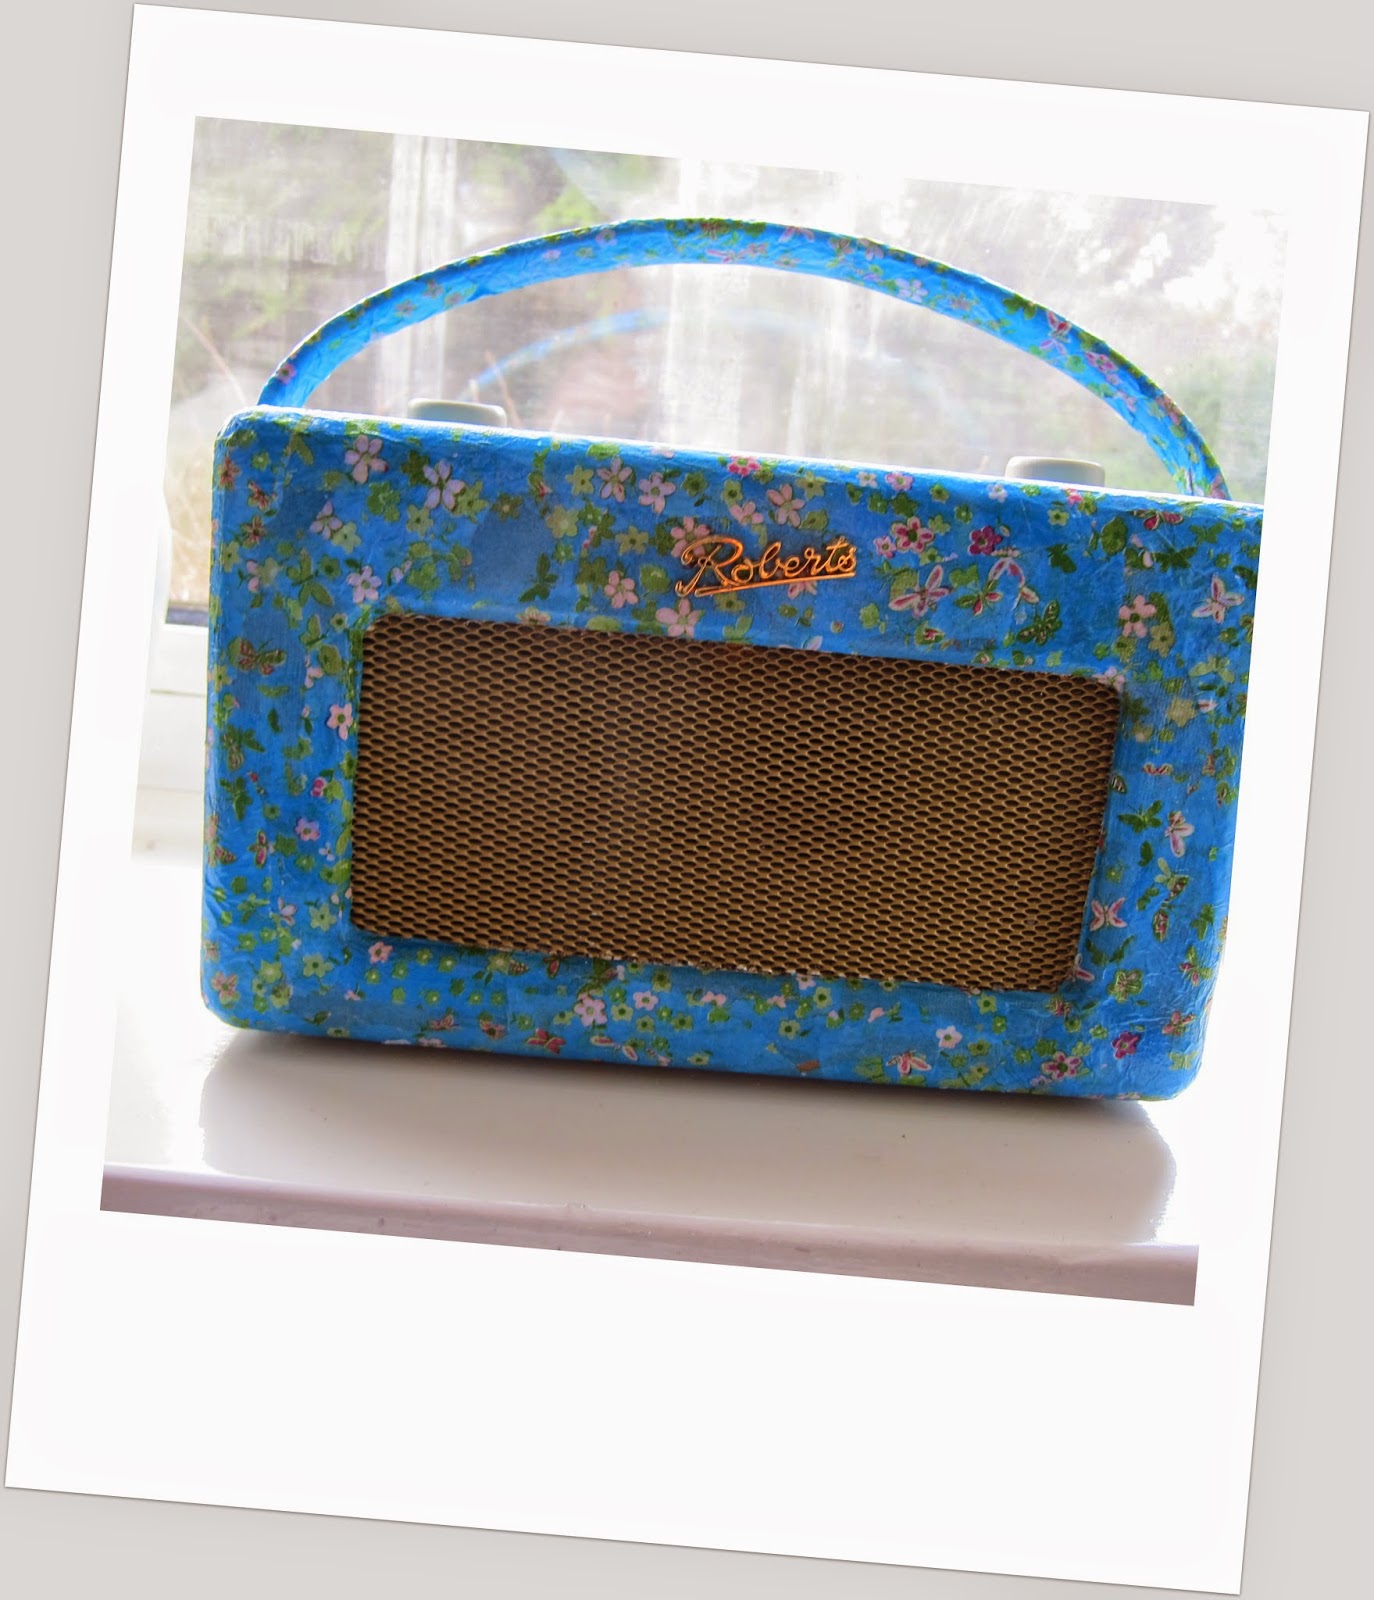
decopatching a Roberts radio

Decopatched Wireless
In 2006 when we were all beginning to ride the retro wave I was given a beautiful Roberts kitchen radio. It looked like this, all shiny and new:
After 9 years in the kitchen something had happened to the false leather casing. Just light pressure was causing it to shear off and it was in a very sorry state. Must have been all the fry-ups degrading the material.

All was not lost, however. Last week I discovered a new craft: Decopatch. All you need is deco patch paper (I used 3 sheets) and the proper glue and a stiff brush.

First clean off all the faux leather casing (using the side edge of a darning needle, it just scraped away like frosting). Then wipe it with surgical spirits to remove any residual grease.

Then for the fun part:

  • Tear the paper into small strips. 
  • Paint the decopatch glue onto the surface to be covered and the strips and just like paper mache, cover the entire thing. 
  • Care needs to be taken at edges to ensure a neat result (I used strips of the edges of the deco patch paper). 
  • Paint a layer of glue over the strips as you apply it.
  • It dries in hours    
  • Or watch the video tutorial:

The results are so pleasingly professional, I guarantee once you try this craft you will be looking around at familiar objects through decopatch-tinted glasses. There are so many possibilities.... 


My deco patch Roberts radio - better than new


Sunday, 1 February 2015

Throwing out the gauntlets or how not to wash wool

Hat, cowl and gauntlet ensemble in merino and silk
For a while I have been meaning to blog about this merino/silk ensemble I made last winter. I seem to recall adapting the patterns and all 3 were knitted in the round. I think the hat was based on a Ravelry pattern but as I have forgotten my password and username and locked myself out of that website I can't check.

The hat almost but didn't quite work, though I was delighted to find such a close colour match in this beautiful handmade ceramic button. I think it would have been perfect but I didn't quite make it tall enough for my long thin head.
Hat band with handmade button
The yarn is beautifully soft and warm - Manos Silk blend - I recommend it and would definitely use it again. The variegated colour way means it co-ordinates with quite a few outfits.
Manos Silk Blend 30% silk 70% merino
More often than not I don't really like the end results of my knitting, which might be because I am so much better at it in my imagination. So it was an unexpected delight to make something I actually liked and would wear. I have worn the cowl and gauntlets many many times over the last year, so much so I feel I have really experienced the practical rewards of knitting for a change...

....which is just as well given last week's wash cycle disaster or I would have cried.... 

Behold 2 gauntlets. The one on the left was washed at 40 degrees on the wool wash cycle. Let's call that the CONTROL. The one on the right was washed at 30 degrees on the synthetics cycle. Apparently it is not the water temperature that matters but the amount of agitation in the wash cycle. The CONTROL gauntlet still fits perfectly. The tiny gauntlet does not. 

The sheepish perpetrator of this mishap tried to pitch this to me as a scientific phenomenon of wondrous intrigue . He had invented felt and the secret is agitation. We had both learned some useful lessons. 
Tiny felt gauntlet
  
Gauntlets - wool wash and synthetic wash

Tuesday, 25 November 2014

Up-cycled tights tidies

There is nothing worse in the morning than fighting through a twisted knot of tights in a drawer that barely closes, trying to find the brother of a sock that might or might not be squirrelled away in the dark depths. It is like starting the day by fighting a gorgon, and it makes me as grumpy as I am when making a bed.

Well those days are at an end. I now have 'tights tidies':
Tights tidies 

The idea came from this peg bag I made a few years ago which is still going strong. I decided to use thinner lighter hangers for the tights bags to save room. You can just about see that I have actually sewed the bags onto the hangers, unlike the peg bag.

Handmade quilted peg bag
Another irksome thing about mornings is locating what seems to be a pair of plain tights only to discover on putting them on that they are actually 'fun' or novelty tights, which just won't do for work. So at first glance 4 tights tidies may seem extravagant, but in the interests of segregation it makes good sense.

So here we have the nude tights bag (all bags are lined with organza left over from the mandala quilt). The skirt is a remnant from a cushion and the purple is left-over backing from my first quilt made in about 2004)...
nude tights tidy
...and then there is the plain dark tights bag. The skirt is a cutting from the car seat-covers I patched in 2009 which had seen better days, the legs are from the mandala quilt and the pale blue is backing from my mum's 60th birthday quilt...
dark tights tidy
...and then there is the woolly tights bag. The backing is of course the same as the peg bag and the legs I am so happy about because they are leftovers from the last post so in the end very little of the marathon cape knitting disaster went to waste...
woolly tights tidy
...and last but not least there is the fancy or novelty fun tights bag. More up-cycled car seat patch covers for the skirt and old quilt backing strips for the legs. Even the buttons are orphan buttons from my button box.
novelty tights bags

Oh and if this seems a little o-c, a quick internet search reassures me there are always others who take it that one step further. Some people have really thought this through- see wear at work tights storage, odd socks and pretty frocks storage, kitty cat stevens - how I organise my tights, lana red tight tights.

So the problem I have now is finding storage space for the tights storage. Life is a series of challenges.